A page hero is a large section above the content — a heading and buttons over a background image, a post title with its date and author, or a full-screen welcome on the home page. You can build one with blocks in a Block Element, or with HTML in a Header Element, which can also lay your site header over the hero.
Requires GP Premium — Elements module. The whole guide is a GP Premium feature.
| Build it with | Best for |
|---|---|
| Block Element › Page Hero | Sites using the block editor: design the hero with blocks and dynamic tags |
| Header Element | HTML, shortcodes and template tags, and merging the site header with the hero (transparent header) |
Appearance → Elements → Add New → Block (Element type Page Hero) or Header
Block Element Page Hero
- Go to Appearance → Elements → Add New, choose Block, and set the Element type to Page Hero.
- Build the hero with blocks. Use dynamic tags for the title, date, author or featured image, so one hero works for every post.
- Set the Display Rules — for example Post › All Posts — and publish.
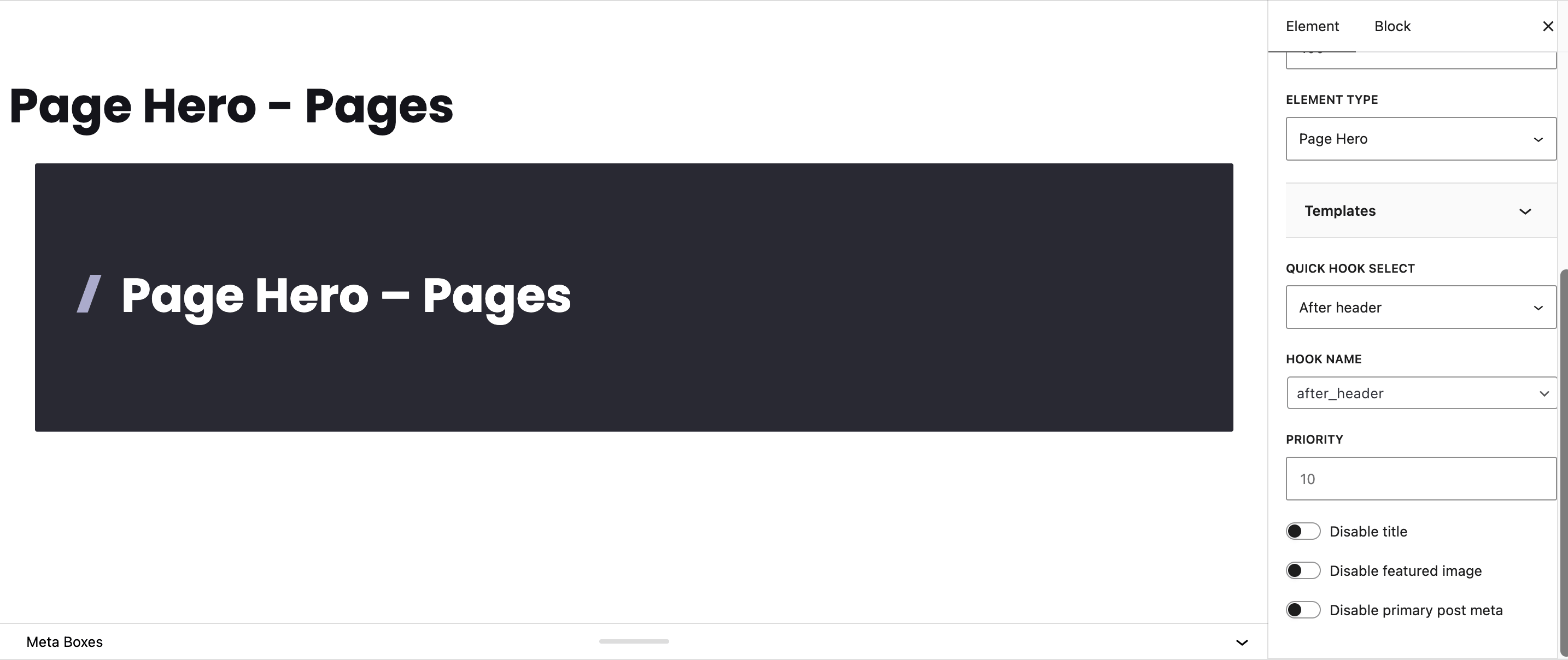
Settings
- Templates — import a starting design.
- Quick hook select — one of three common places for the hero; or choose any Hook name, with a Priority.
- Disable title — removes the page’s own title, when the hero shows it instead.
- Disable featured image — removes the featured image, when the hero uses it as an image or background.
- Disable primary post meta — removes the post meta below the title, when the hero shows it.
- Background image — a fixed background image for the hero.
To show the author, date and categories on one line, put them in an Element block set to Display: Flex (see Block Elements › Content Template). For a featured-image background, select the Element, open its Settings tab, and under Inline Background Image click the dynamic tag icon and choose Featured Image (it inserts {{featured_image key:url}}).
Creating a Header Element page hero
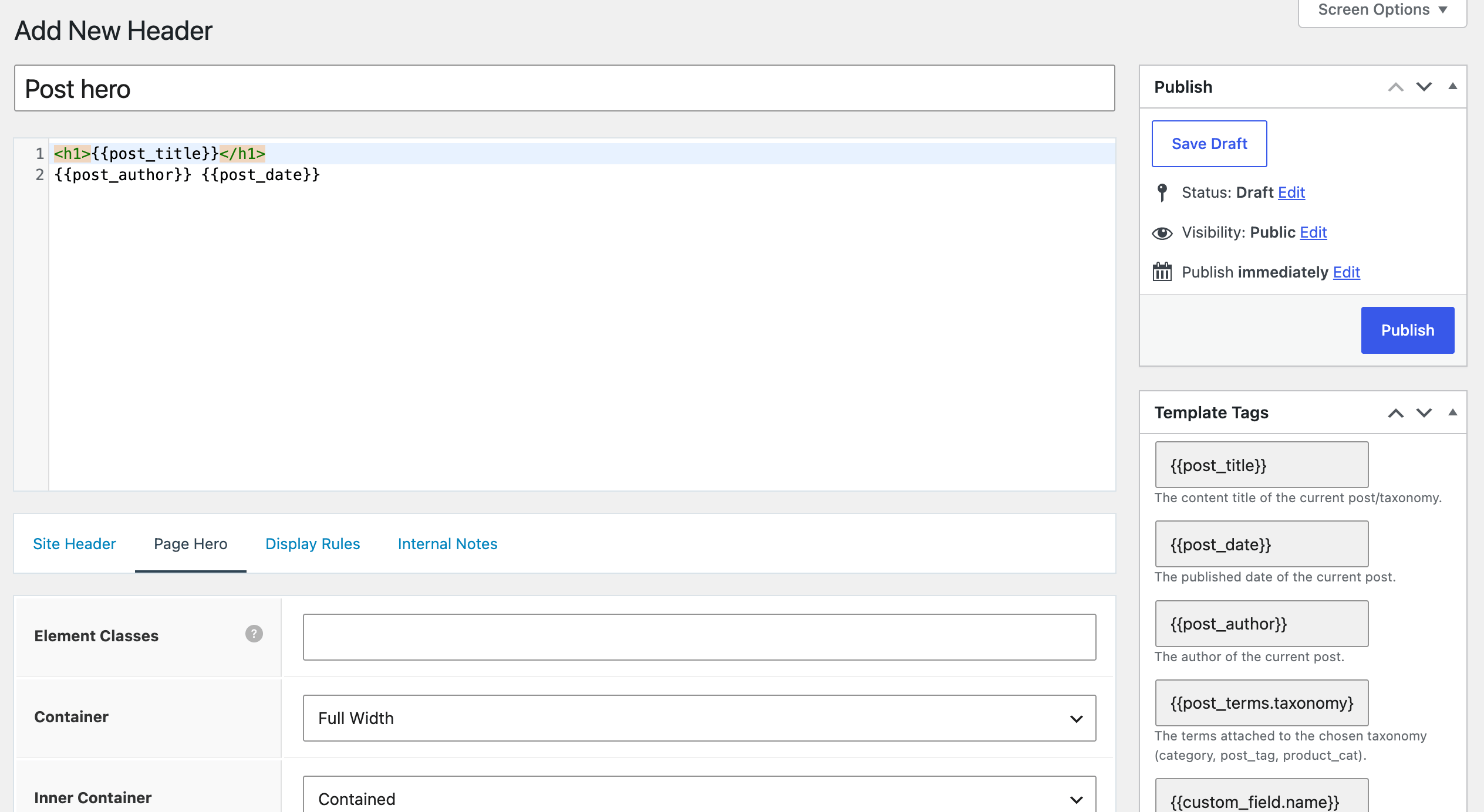
Go to Appearance → Elements → Add New and choose Header. Then:
- Add the content. Type HTML, shortcodes or template tags, for example:
<h1>{{post_title}}</h1>
{{post_author}} {{post_date}}
To show only a background image, with no text, add an HTML comment such as <!-- hero --> — the content box can’t be empty.
- Choose a background in the Page Hero tab: a solid Background Color, the post’s Featured Image, or a Custom Image.
- Set the width with Container and Inner Container.
- Set the height with the top and bottom Padding.
- Position the content with Horizontal Alignment, and fine-tune it with the padding.
- Merge with the site header (optional) — in the Site Header tab, see Transparent header and navigation.
- Set the Display Rules and publish.
Header Element
The Header Element replaced the old Page Header module; to migrate, see Legacy Features. Its settings are in three tabs, plus Display Rules and Internal Notes as for every element.
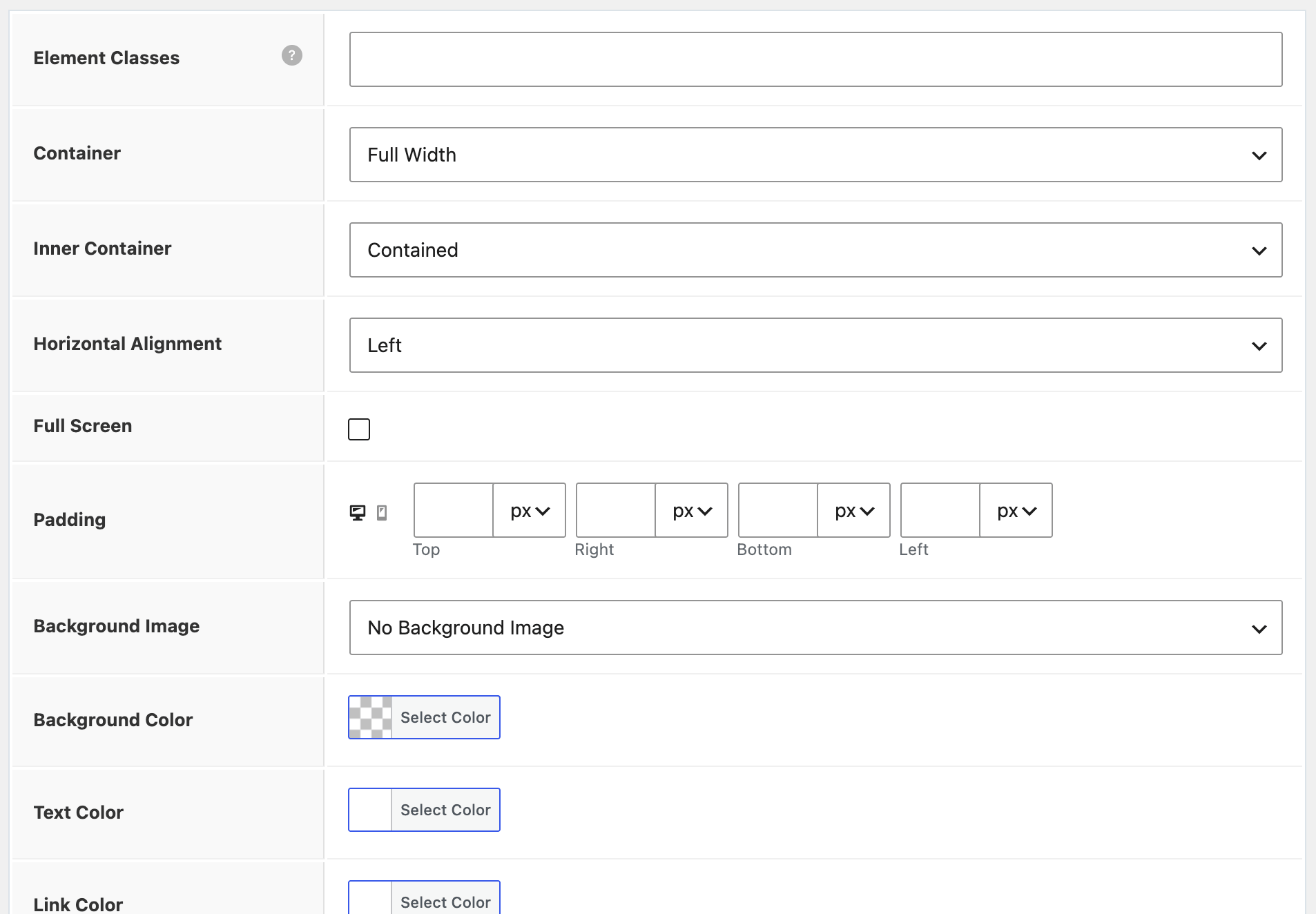
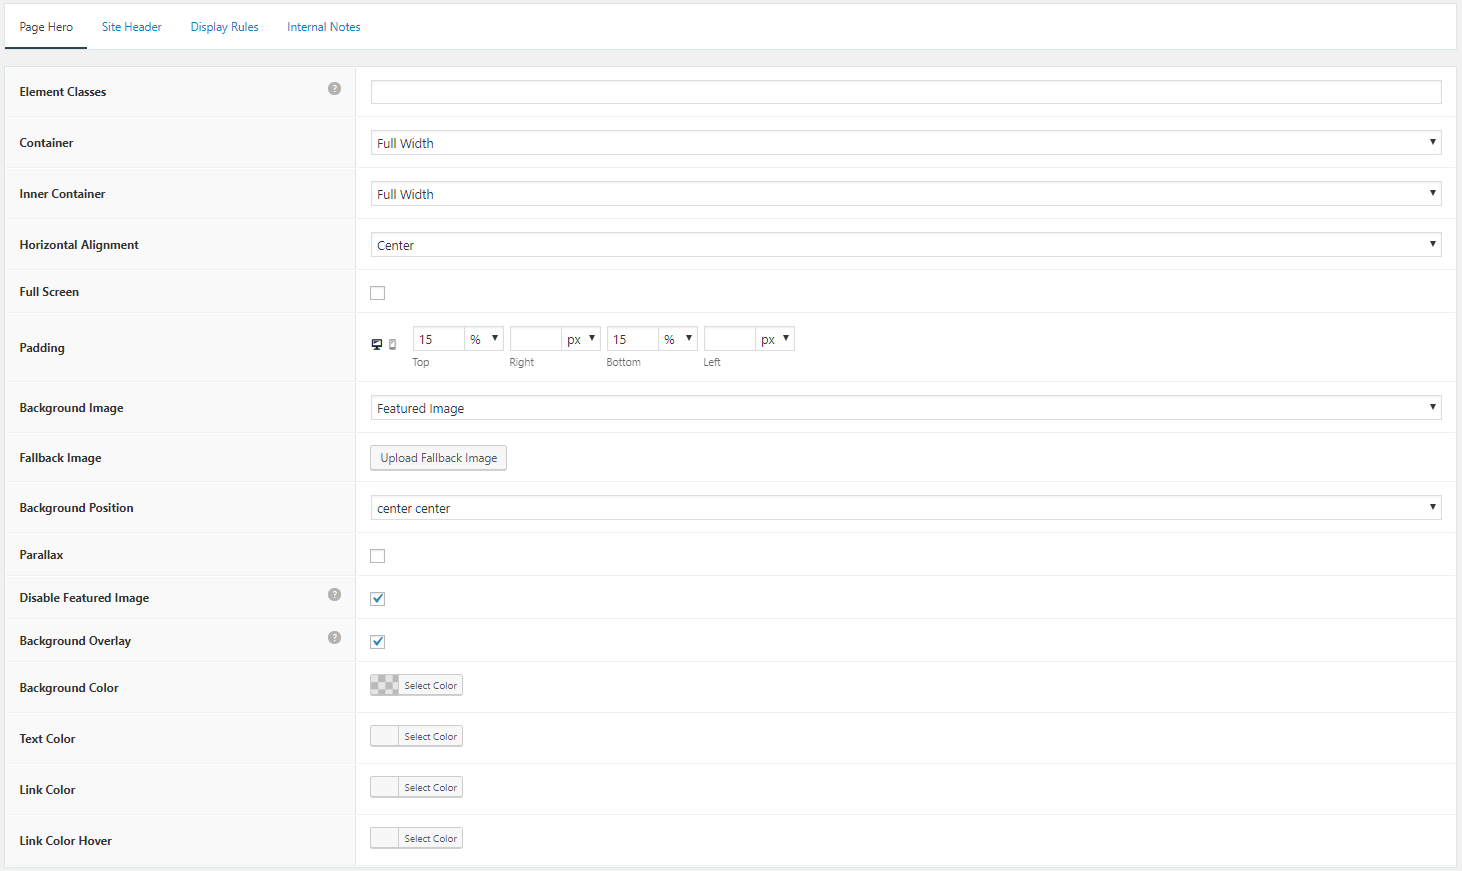
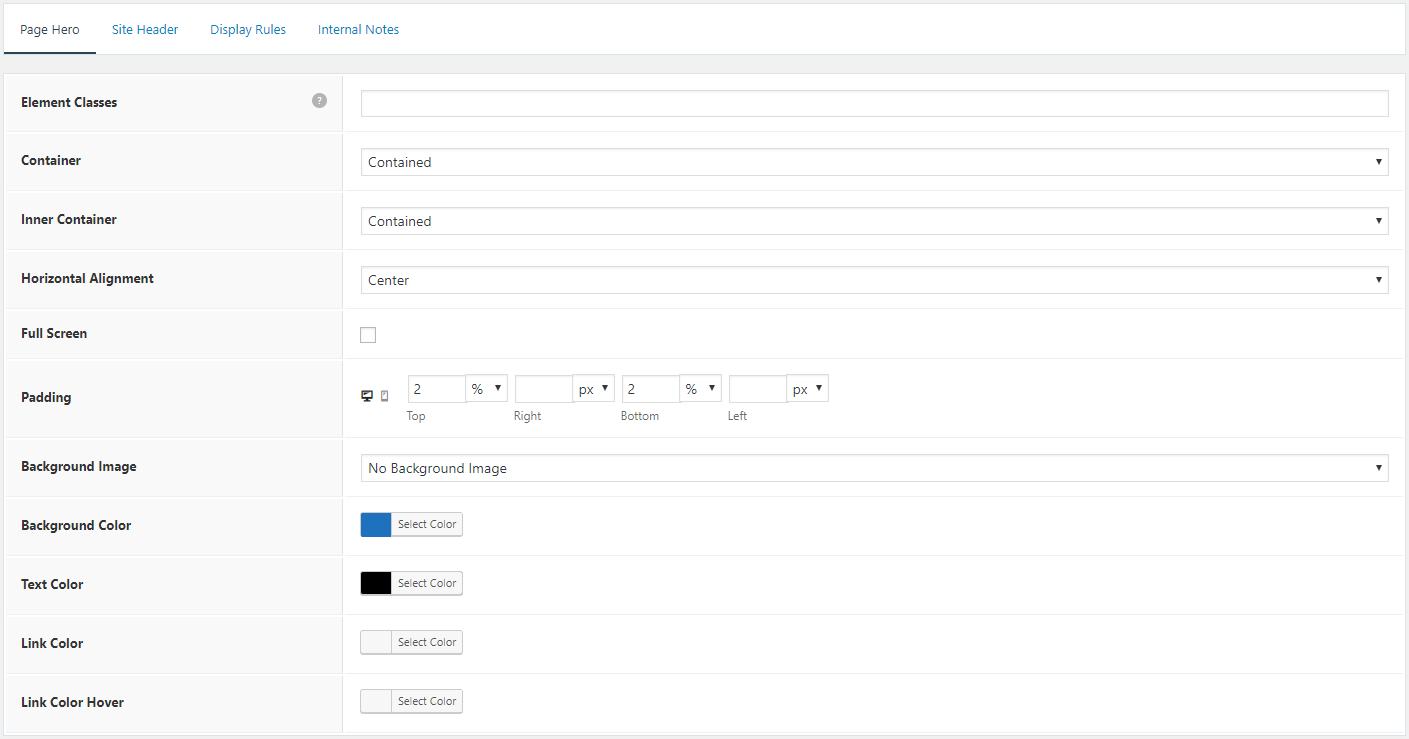
Page Hero tab
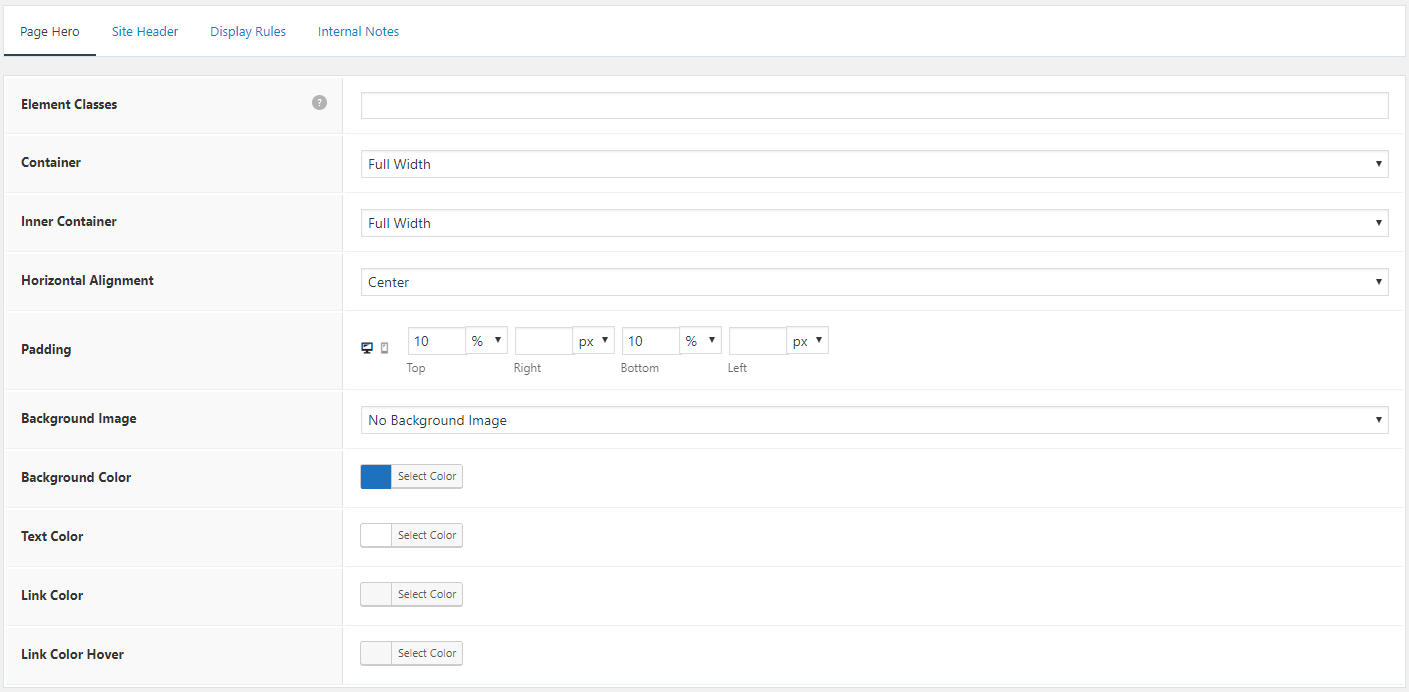
- Element Classes — your own CSS classes for the hero.
- Container — the box carrying the background: Full (the width of the screen) or Contained (your container width).
- Inner Container — the box holding the content: Full or Contained.
- Horizontal Alignment — left, centre or right.
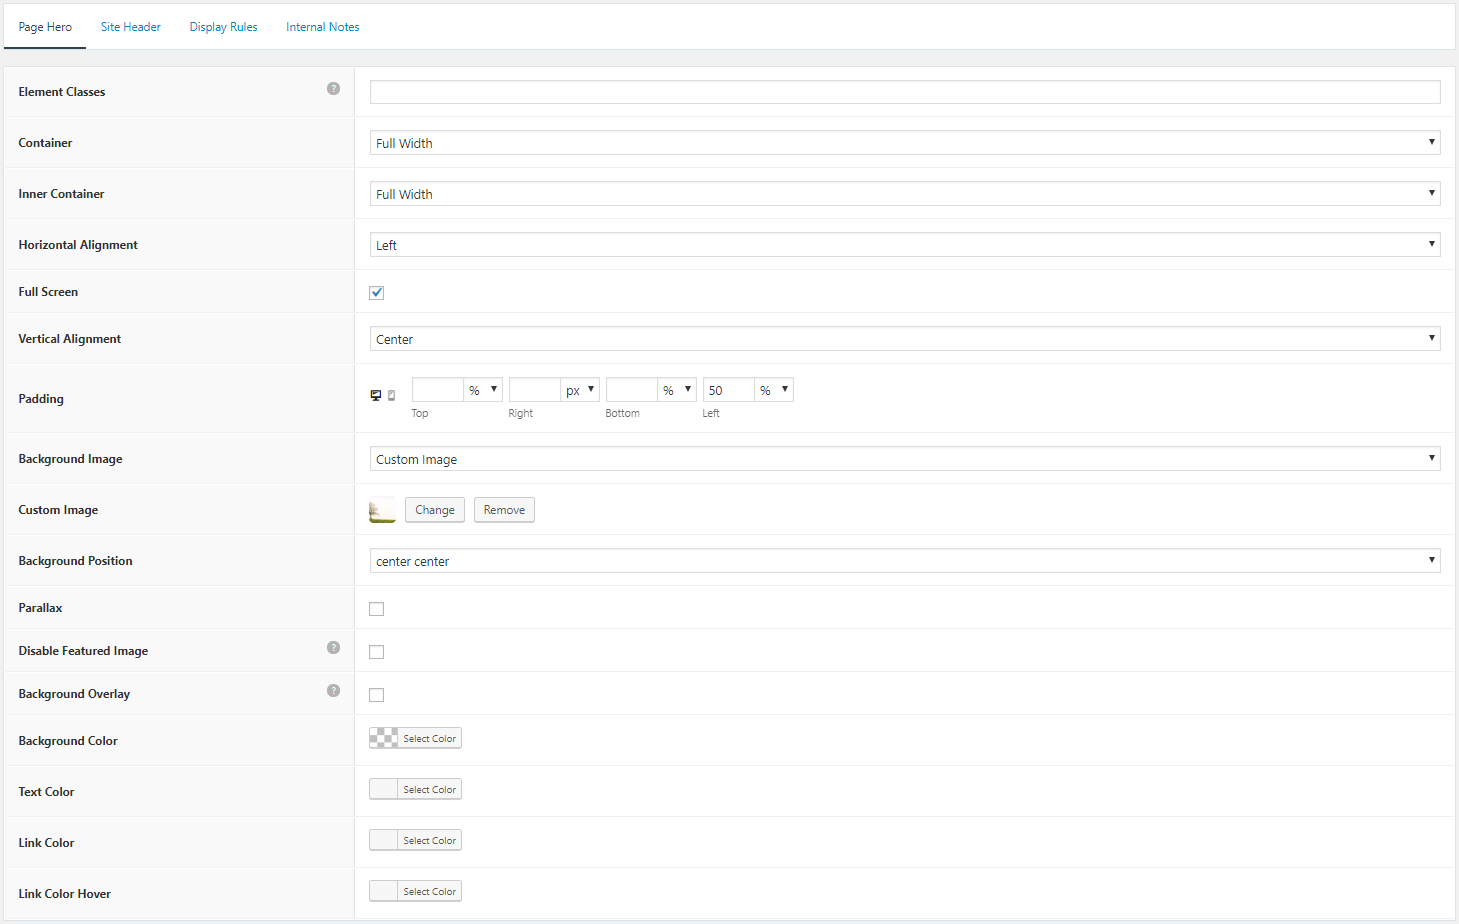
- Full Screen — fills the whole screen. Only available when the header is merged; see Fill the space below the header otherwise.
- Padding — sets the hero’s height (top and bottom) and the content’s position. Toggle to set mobile values.
- Background Image — the Featured Image (with a fallback image for posts that don’t have one) or a Custom Image. With an image, you also get Background Image Position, Parallax, Disable Featured Image (so the image doesn’t show twice) and Background Overlay (the background colour laid over the image).
- Colors — the background, text, link and link hover colours.
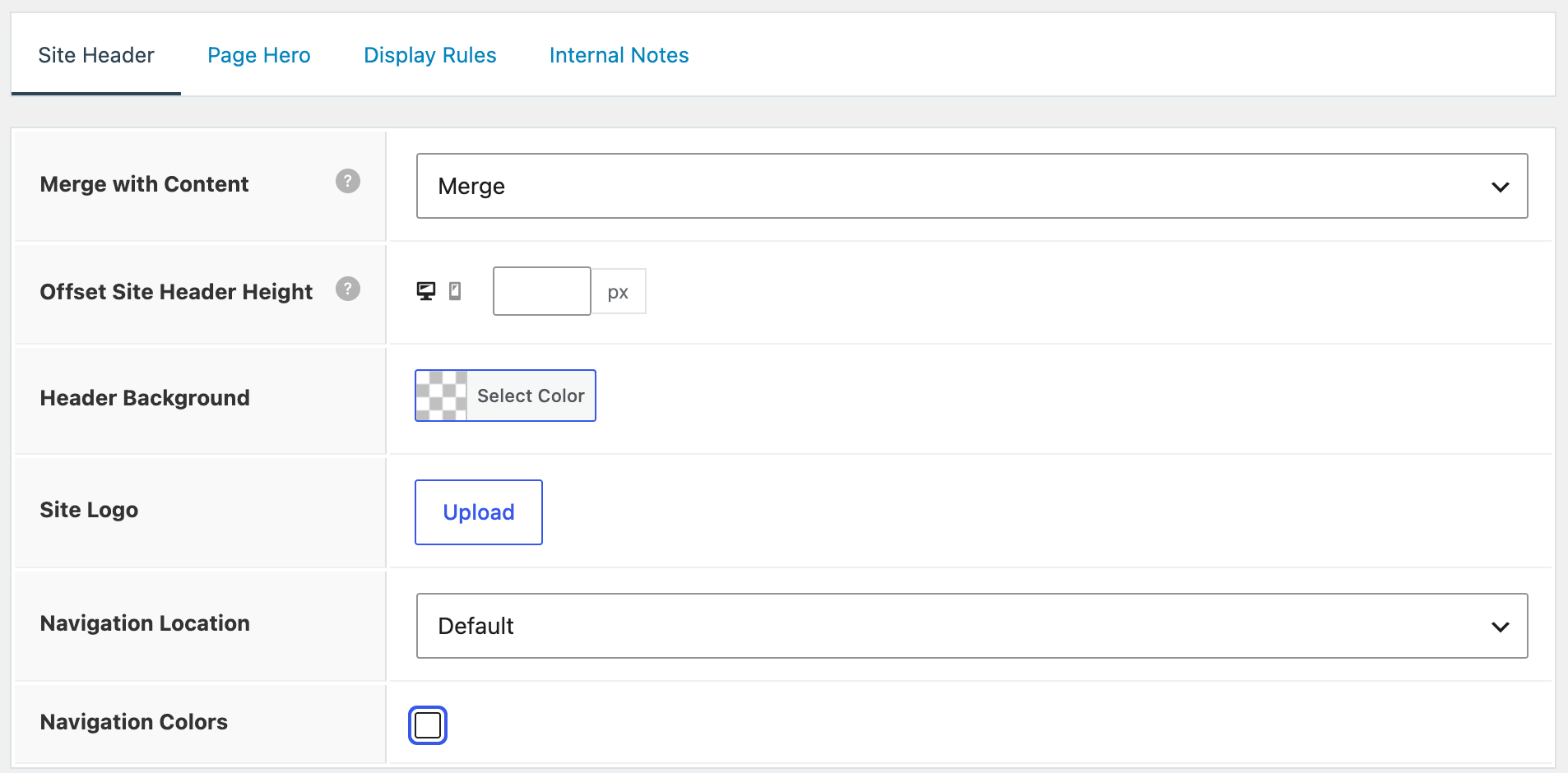
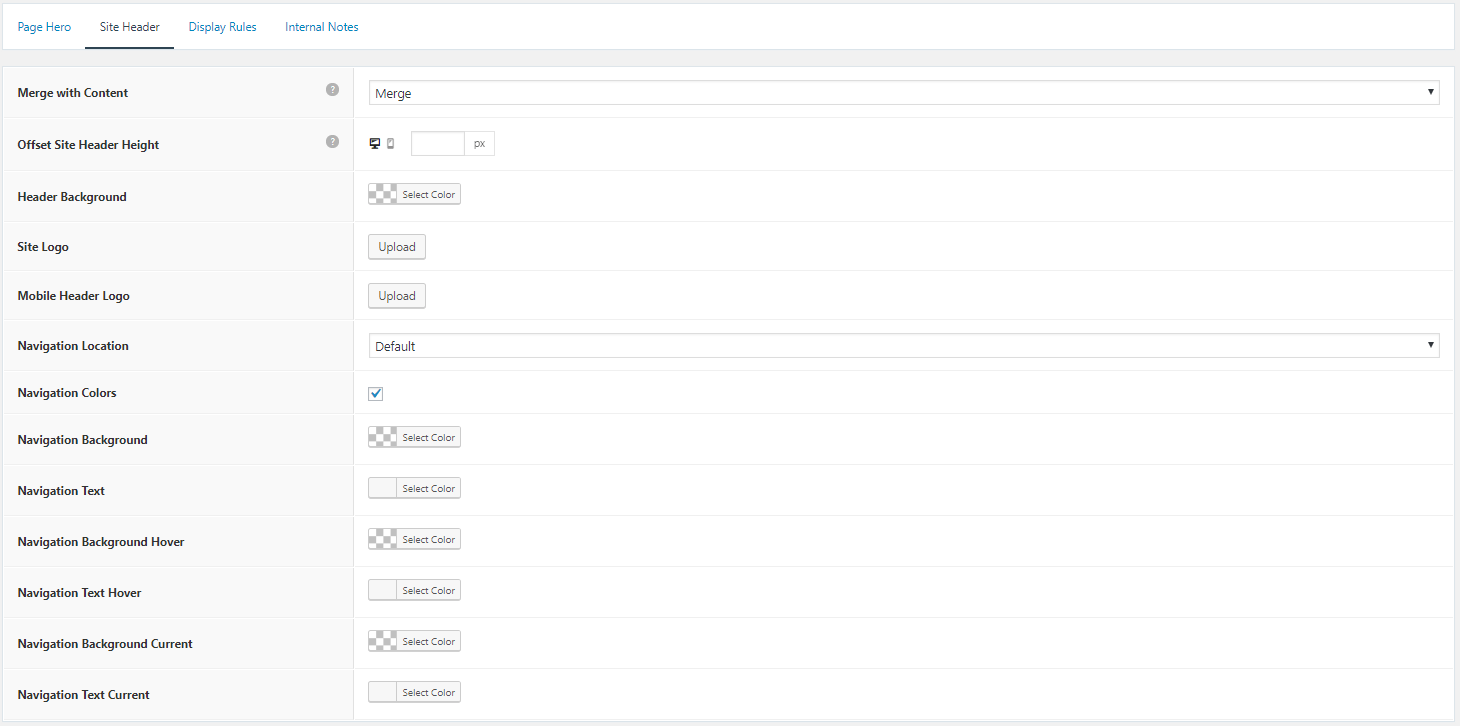
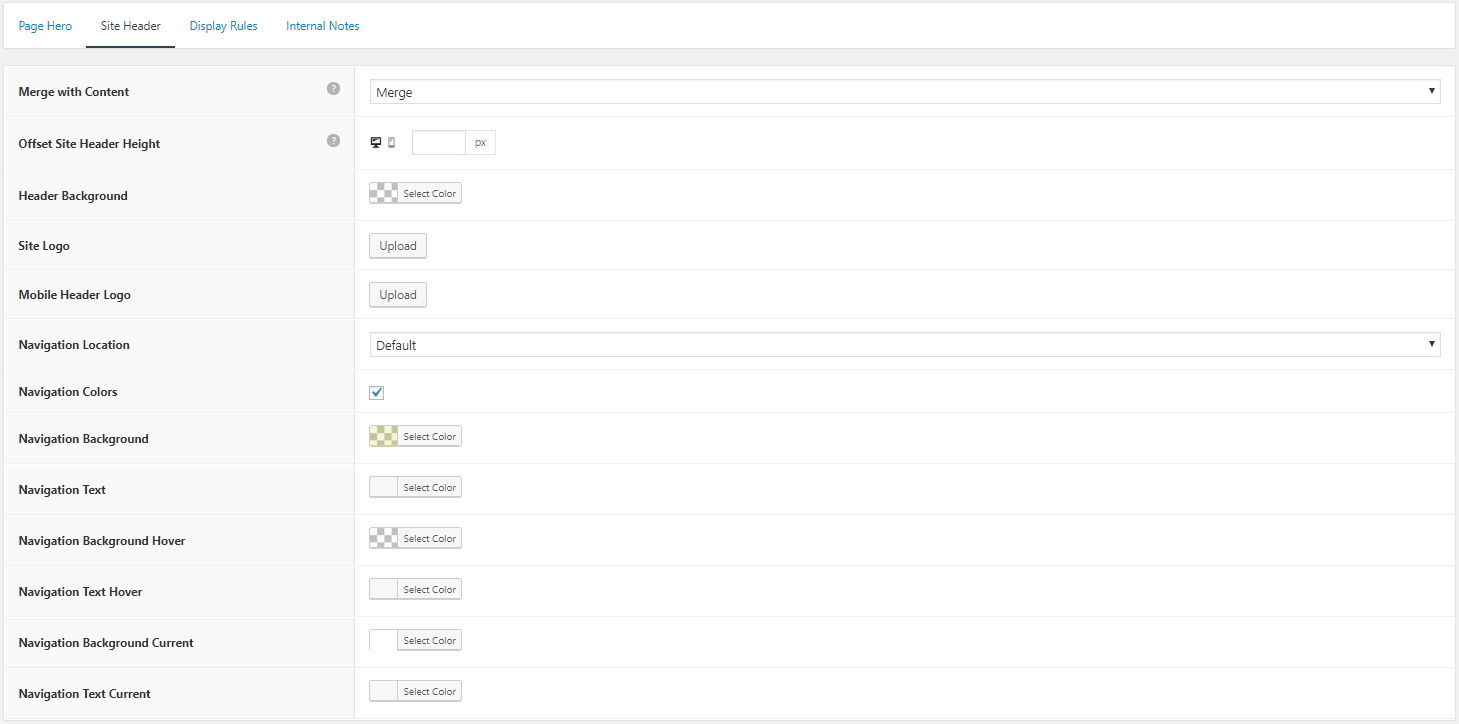
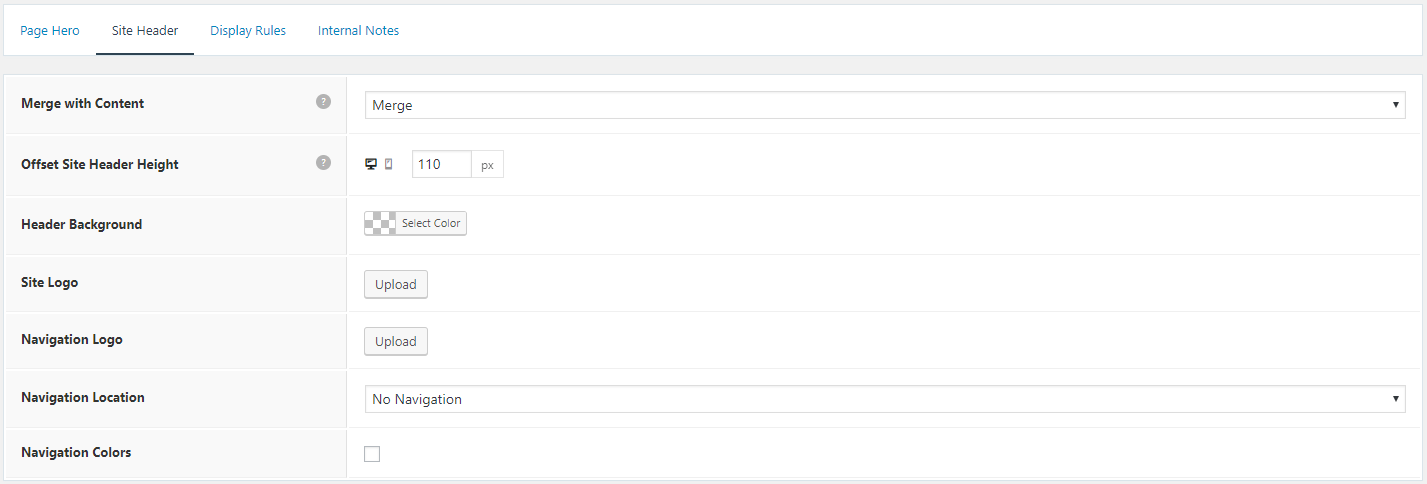
Site Header tab
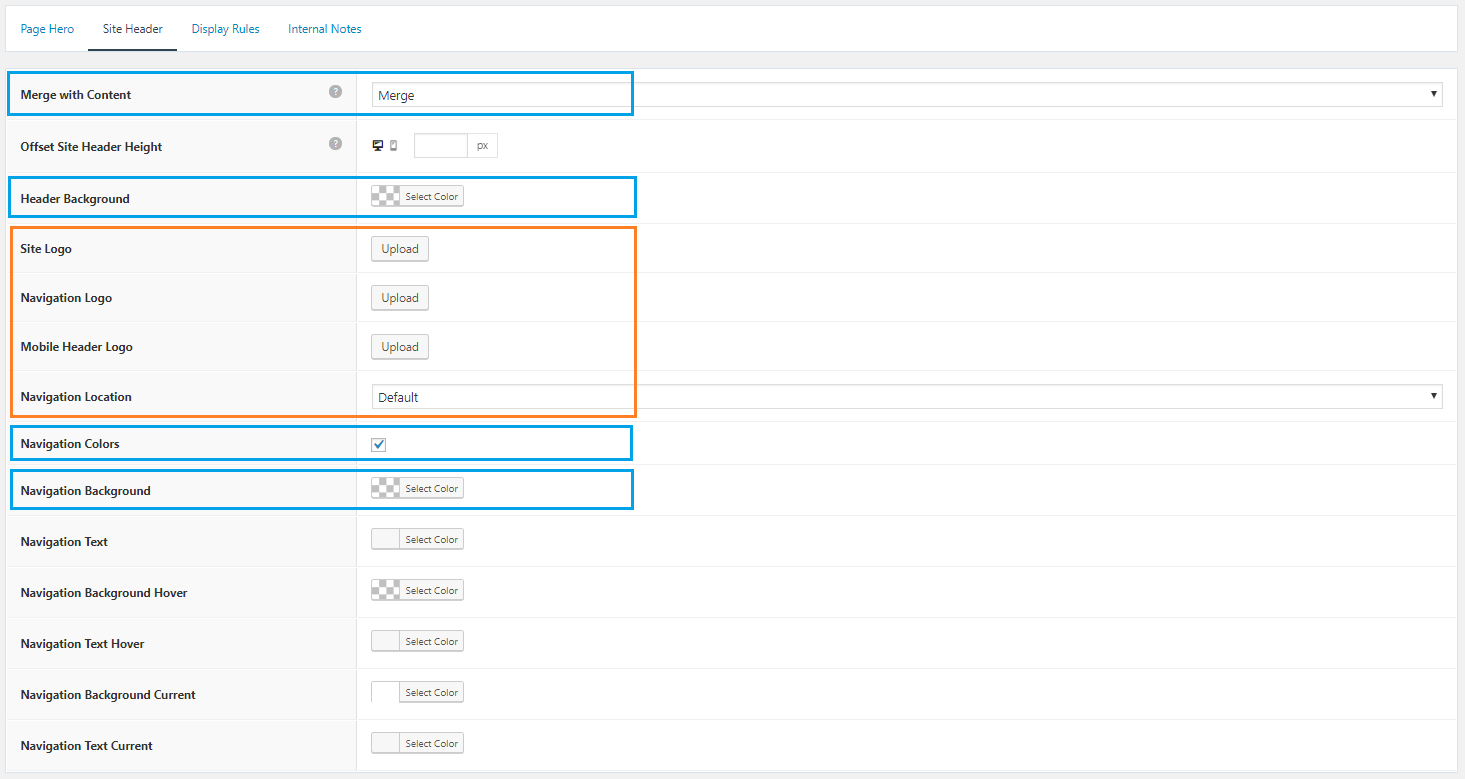
- Merge with Content — lays the site header over the hero: No Merge, Merge or Merge on Desktop Only. The options below appear once it’s merged.
- Offset Site Header Height — adds the header’s height to the hero’s top padding so the header doesn’t cover the content (for example 100px for a 100px header).
- Header Background — the header’s background on these pages, replacing the one in Colors. Use a transparent colour for a see-through header.
- Site Logo — a different logo for these pages, such as a white logo over a dark image. A logo must already be set in Site Identity.
- Mobile Header Logo — a different mobile header logo. Only shows when the mobile header is turned on in the Customizer.
- Navigation Location — a different navigation location for these pages.
- Navigation Colors — navigation colours for these pages. The sticky navigation keeps the Customizer colours.
Transparent header and navigation
A see-through header and menu over the hero image is one of the most popular layouts, and it works with or without a page builder.
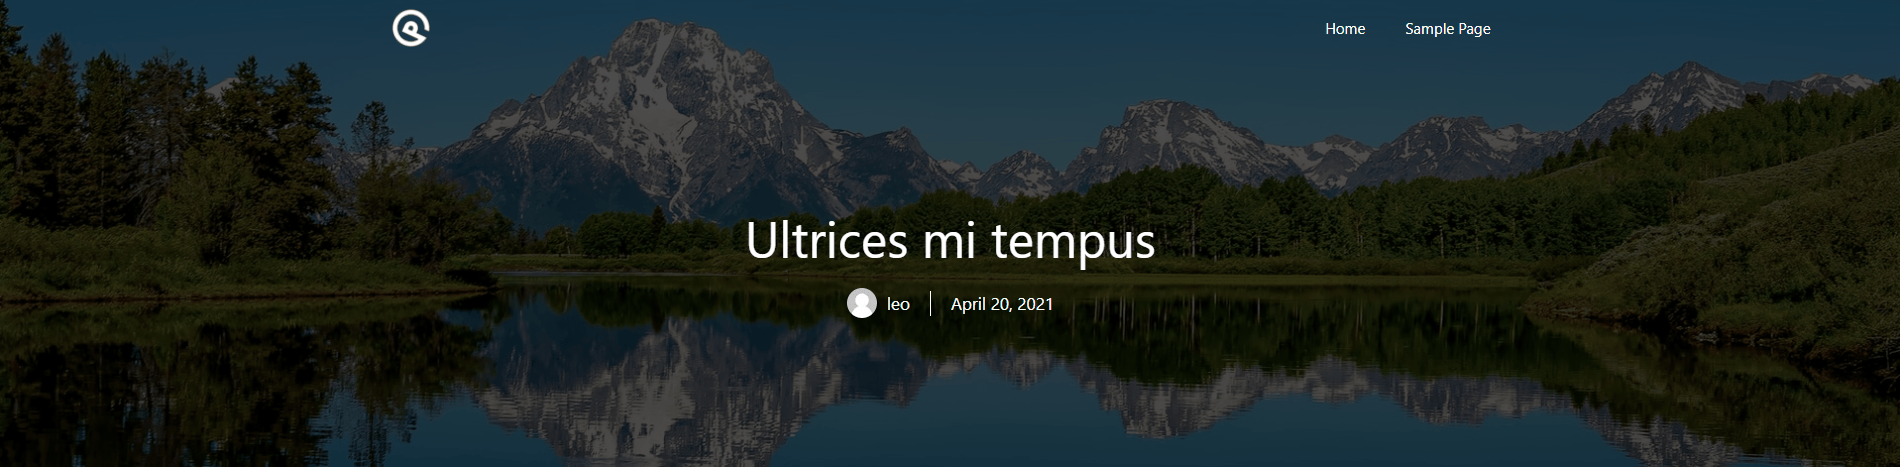
- Create a Header Element with a background image (see Creating a page hero).
- In the Site Header tab, set Merge with Content to Merge (or Merge on Desktop Only).
- Set Header Background and the Navigation Colors background to transparent, and the text colours to suit the image.
- Use Offset Site Header Height or extra top padding so the content isn’t hidden under the header.
- Optionally choose a different Site Logo, Mobile Header Logo or Navigation Location for these pages.
Recipes & customizations
Recipes add code as explained in Adding Custom Code.
Page hero examples
Ready-made Header Element heroes. Each lists the content; set the options described.
Example 1 — heading and button. Content:
<h1>Reach the peak</h1>
<p><a class="button" href="#">Call to Action</a></p>
A Custom Image background, Full container, Contained inner container, centre aligned, with generous top and bottom padding. To give buttons a border:
a.button,
a.button:visited,
button,
input[type="submit"] {
    border-width: 1px;
    border-style: solid;
    border-color: inherit;
}
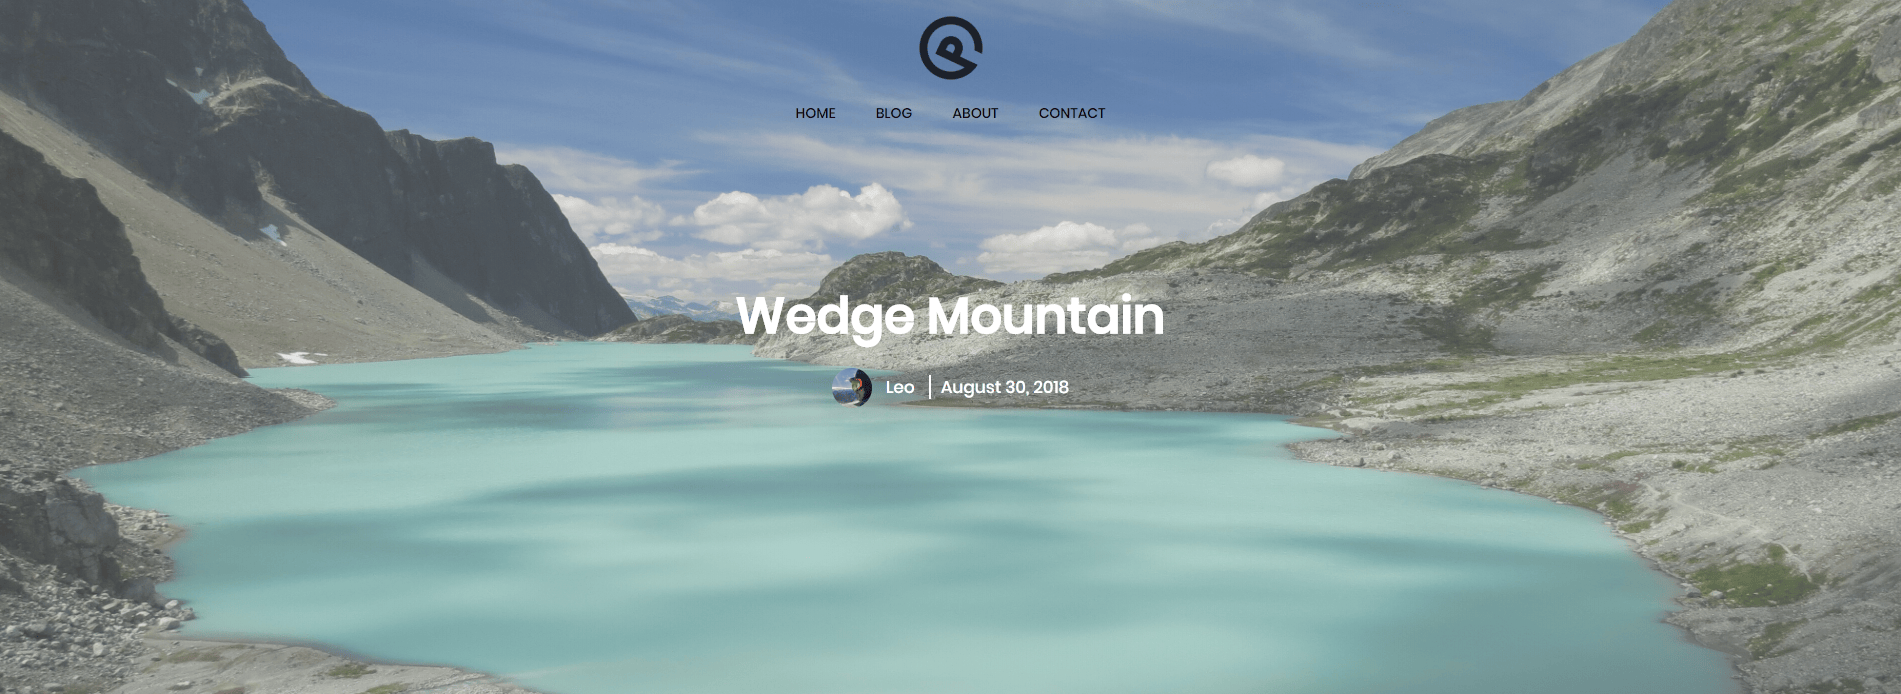
Example 2 — post title with the author’s avatar. Content:
<h1>{{post_title}}</h1>
[page_hero_gravatar] {{post_author}} {{post_date}}
Use the Featured Image background and Disable Featured Image. The shortcode:
add_shortcode( 'page_hero_gravatar', function() {
    ob_start();
    global $post;
    ?>
    <div class="page-hero-gravatar">
        <?php echo get_avatar( $post->post_author ); ?>
    </div>
    <?php
    return ob_get_clean();
} );
.page-hero-gravatar img {
width: 40px;
height: 40px;
border-radius: 50%;
vertical-align: middle;
margin: 0 10px 0 0;
}
.page-hero .author,
.page-hero-gravatar {
display: inline-block;
}
.page-hero .entry-date {
border-left: 2px solid #fff;
padding-left: 10px;
margin-left: 10px;
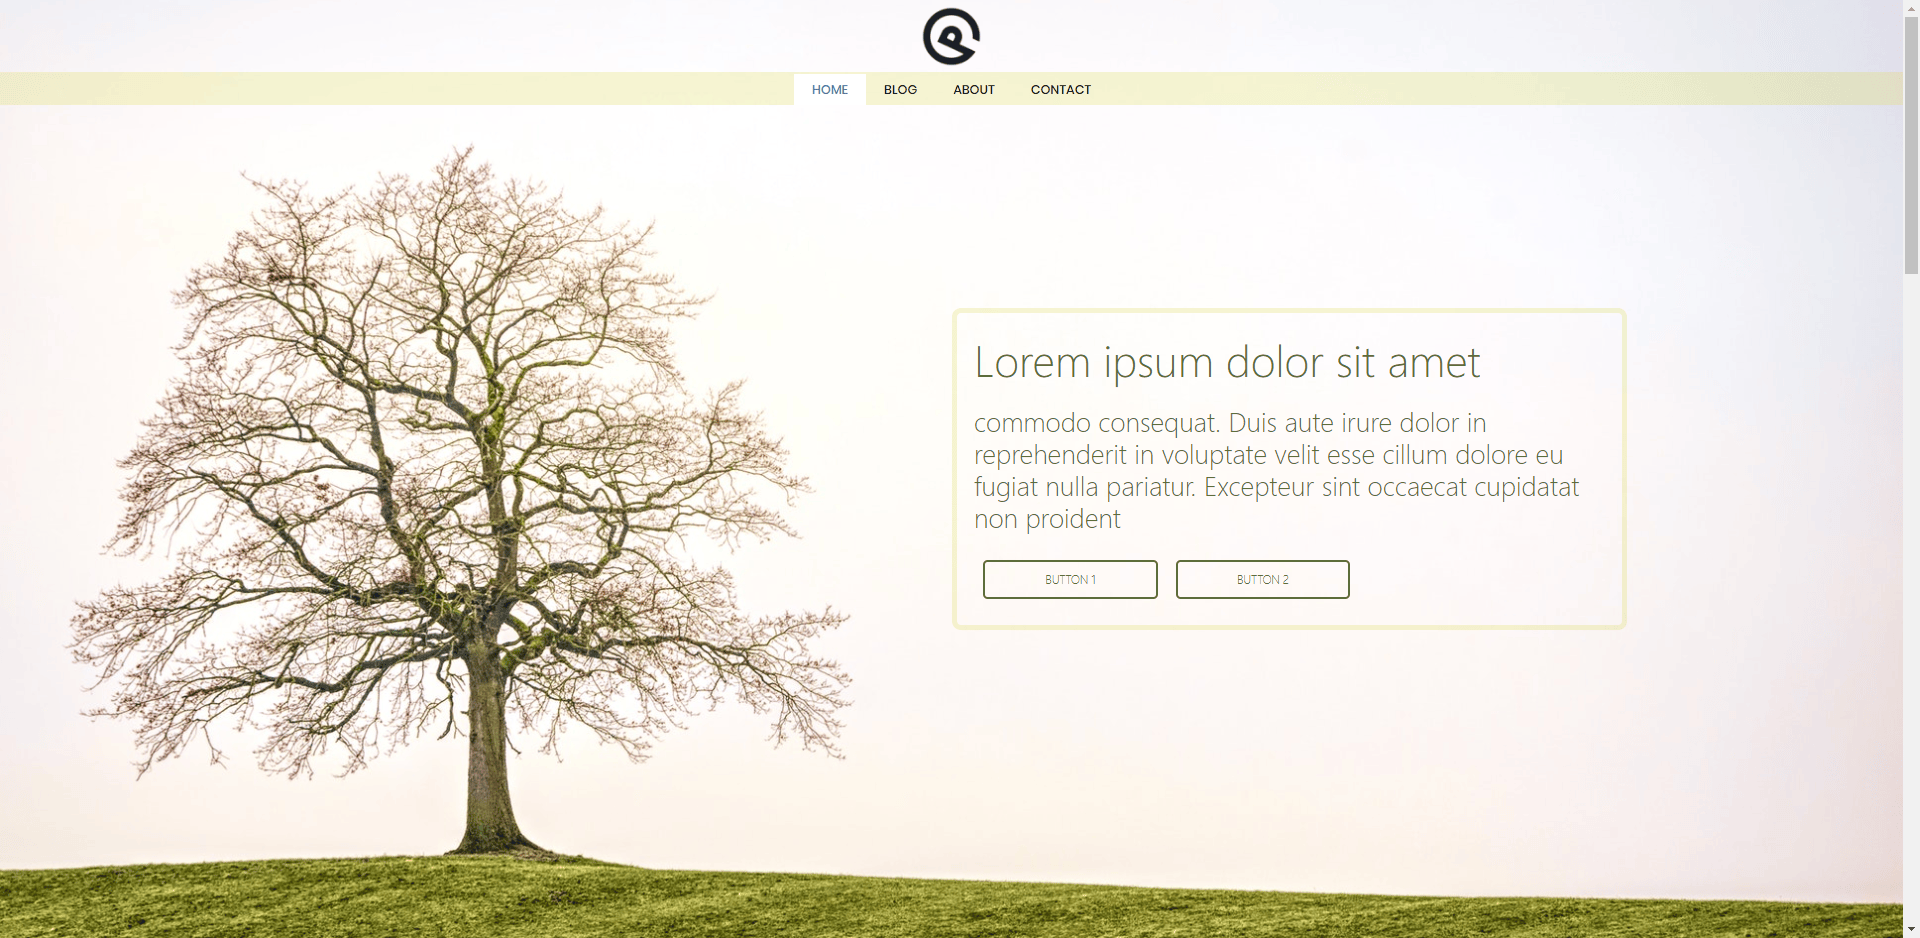
}Example 3 — content box on the right. Content:
<div class="page-hero-content">
    <h1>Lorem ipsum dolor sit amet</h1>
    <h2>Duis aute irure dolor in reprehenderit in voluptate velit esse.</h2>
    <div class="page-hero-buttons">
        <a class="button">Button 1</a>
        <a class="button">Button 2</a>
    </div>
</div>
.inside-page-hero {
display: grid;
grid-template-columns: 1fr 1fr;
}
.page-hero-content {
grid-column: 2;
max-width: 700px;
padding: 20px;
border: 5px solid rgba(211, 211, 35, 0.2);
border-radius: 10px;
}
@media (max-width: 768px) {
.inside-page-hero {
display: block;
}
.page-hero-content {
padding: 10px;
margin: auto;
}
}Example 4 — post title with the excerpt
Content:
<h1>{{post_title}}</h1>
[page_hero_excerpt]
The shortcode shows the post’s manual excerpt, if it has one:
add_shortcode( 'page_hero_excerpt', function() {
    ob_start();
    global $post;

    if ( has_excerpt( $post->ID ) ) {
        ?>
        <div class="page-hero-excerpt">
            <?php the_excerpt(); ?>
        </div>
        <?php
    }

    return ob_get_clean();
} );
.page-hero-excerpt {
border-top: 2px solid #fff;
border-bottom: 2px solid #fff;
}
.page-hero-excerpt p {
color: #fff;
margin-bottom: 0;
}

Background video
Add the video and your content in the Header Element’s content:
<video loop muted autoplay playsinline poster="URL/TO/poster.jpg" class="background-video">
    <source src="URL/TO/video.mp4" type="video/mp4">
    <source src="URL/TO/video.webm" type="video/webm">
</video>

<div class="background-video-content">
    Your hero content here.
</div>
loop repeats the video, muted silences it, autoplay starts it on load, playsinline lets it play on phones, and poster is the image shown while it loads. Only one source is needed.
.page-hero {
    position: relative;
    overflow: hidden;
}

.background-video {
    position: absolute;
    top: 0;
    right: 0;
    bottom: 0;
    left: 0;
    width: 100%;
    height: 100%;
    object-fit: cover;
    opacity: 0.5; /* Lets the background colour show through */
}

.background-video-content {
    position: relative;
    z-index: 1;
}
For a video in a Block Element Page Hero, see Content › Adding a background video.
Fill the space below the header
Full Screen only works when the header is merged. To make an unmerged hero fill the rest of the screen below the header:
.page-hero {
    min-height: calc(100vh - 200px); /* Change 200px to your header's height */
}
Related
- Elements — display rules and Header Element template tags
- Block Elements — dynamic tags and other block templates
- Header — header layout and navigation as a header
- Content › Adding a background video
- Legacy Features — moving from the Page Header module
- Developer reference: Elements and Page Hero filters