GeneratePress’s typography works in two steps: add the fonts you want in the Font Manager, then use the Typography Manager to set the font, size, weight and spacing for each part of the site — body text, headings, site title, navigation, buttons and more. Font colours are in Colors.
Typography is free. GP Premium adds a Font Library for hosting fonts on your own site.
Appearance → Customize → Typography
Icon Type: Appearance → Customize → General
Font Library (GP Premium): Appearance → GeneratePress → Font Library
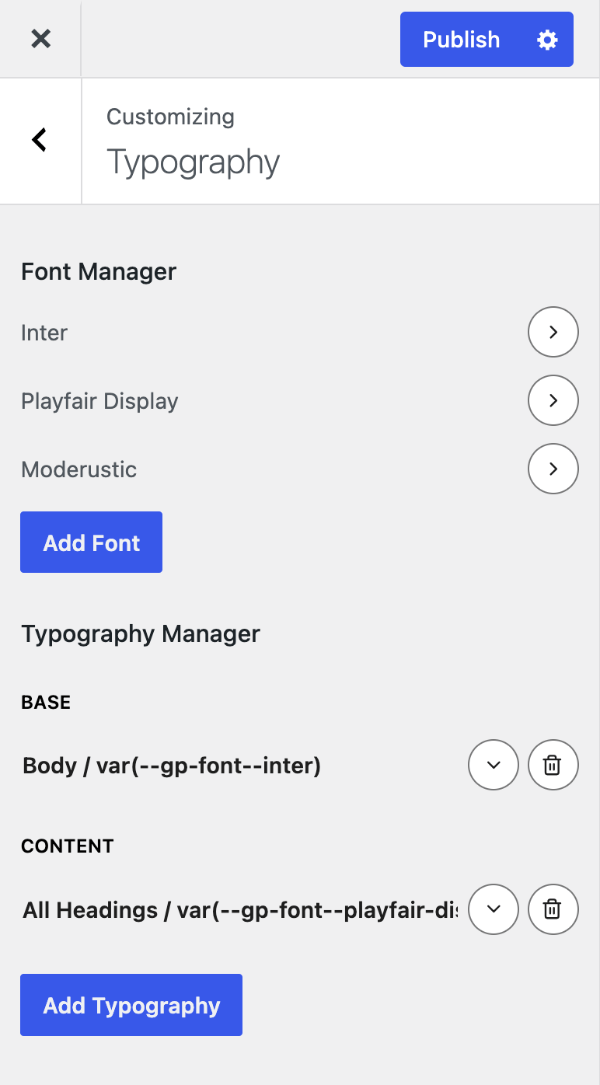
Font Manager
Add each font you’ll use. Click Search fonts to pick from the Google Fonts list or type a name, then choose its variants.
- Google fonts load from Google, and the Google font toggle turns on automatically.
- System fonts (such as the default System Stack) need nothing loaded.
- Your own fonts: type the font’s family name and leave Google font off. The font must already be loaded — with the Font Library (GP Premium) or your own CSS; see Hosting fonts locally.
Font variants
Each weight and style of a Google font — 300, regular, 700, italic and so on — is a separate file. Only tick the variants you use: fewer variants means a faster site. For example, body text might need regular and 700, and a site title just one weight.
Google font-display
With a Google font added, Google font-display sets how text shows while the font loads: Auto (default), Block, Swap, Fallback or Optional. Swap shows text straight away in a fallback font. See font-display on MDN.
Typography Manager
Click Add Typography, choose an element (for example Body, All Headings, Heading 1, Site Title, Primary Menu Items or Buttons), then set its options. Add as many rules as you need.
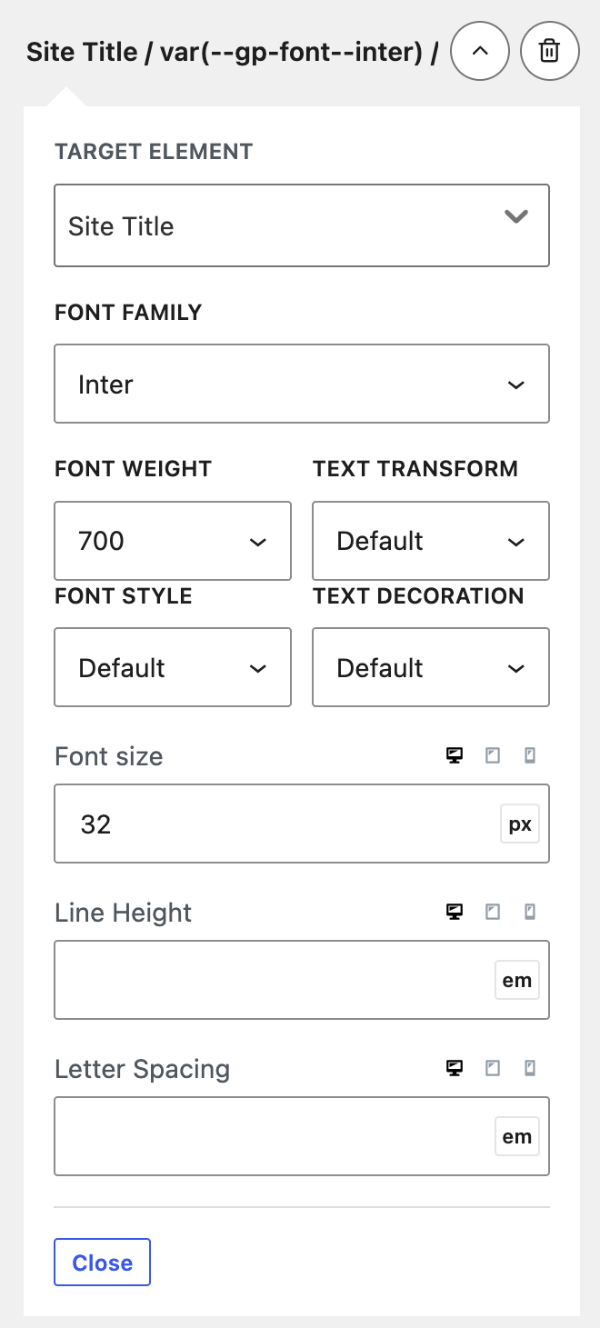
- Font family — any font from the Font Manager.
- Font weight, Font style (normal, italic, oblique) and Text decoration.
- Text transform — None, Capitalize (first letter of each word), Uppercase or Lowercase.
- Font size, Line height and Letter spacing — in px, em or rem (font size also %).
- Bottom margin — the space below the text, for body text and headings.
Use the device buttons to set different values for desktop, tablet and mobile.
Switching from legacy typography
Sites started before GeneratePress 3.1 may still use the older typography system. To switch, tick Use dynamic typography system in Customize → General. The first time, GeneratePress copies your old settings into the Typography Manager — check them under Customize → Typography afterwards. If dynamic typography settings already exist, nothing is copied. New sites use dynamic typography already.
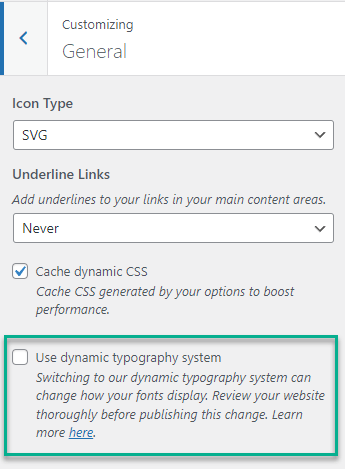
Icon type
Icon Type in Customize → General sets how the theme’s icons (menu arrows, search, menu button and so on) are drawn: SVG (default) or Font. SVG icons are sharper and don’t load an icon font file. Keep Font only if older custom CSS depends on the icon font.
Recipes & customizations
Recipes add code as explained in Adding Custom Code.
Hosting fonts locally
Hosting fonts on your own site avoids requests to Google.
With GP Premium: go to Appearance → GeneratePress → Font Library, find the font and download it to your site. It’s then available in the Font Manager.
Without GP Premium:
- Download the font files. For Google Fonts, the google-webfonts-helper tool lets you choose variants and download
.woff2files with the matching CSS. Only choose the variants you need. - Upload them. Upload the files to your child theme (by FTP), or to the Media Library. The Media Library blocks font files by default; to allow them while you upload, add this PHP and remove it afterwards:
add_filter( 'upload_mimes', function( $mimes ) {
    $mimes['woff']  = 'font/woff';
    $mimes['woff2'] = 'font/woff2';
    $mimes['ttf']   = 'font/ttf';

    return $mimes;
} );- Add the
@font-faceCSS. In google-webfonts-helper, set the folder prefix to the URL of your uploaded files (for examplehttps://example.com/wp-content/uploads/2026/09/), copy the CSS and add it to your site. Note thefont-familyname — you can change it to anything. - Add the font in the Font Manager. Type that exact
font-familyname and leave Google font off.
Show local fonts in the block editor
The block editor doesn’t load your @font-face CSS by default. If the CSS is in Customize → Additional CSS:
add_filter( 'block_editor_settings_all', function( $editor_settings ) {
    $editor_settings['styles'][] = array( 'css' => wp_get_custom_css_post()->post_content );

    return $editor_settings;
} );
If it’s in your child theme’s style.css:
add_filter( 'generate_editor_styles', function( $editor_styles ) {
    $editor_styles[] = 'style.css';

    return $editor_styles;
} );
Remove Google Fonts
Google Fonts only load when you add a Google font in the Font Manager. To stop them loading even so:
add_action( 'wp_enqueue_scripts', function() {
    wp_dequeue_style( 'generate-google-fonts' ); // Dynamic typography (<link id="generate-google-fonts-css">)
    wp_dequeue_style( 'generate-fonts' );        // Legacy typography
}, 50 );
To hide Google Fonts from the Font Manager’s list, use generate_font_manager_show_google_fonts:
add_filter( 'generate_font_manager_show_google_fonts', '__return_false' );All options
| Setting | Section | Choices | Default | Requires | Customizer option |
|---|---|---|---|---|---|
| Font Manager (Choose Font) | Typography | Fonts with variants and Google font toggle | — (empty) | — | generate_settings[font_manager] |
| Google font-display | Typography | Auto · Block · Swap · Fallback · Optional (shown with a Google font) | Auto | — | generate_settings[google_font_display] |
| Typography Manager (Configure) | Typography | Rules per element | — (empty) | — | generate_settings[typography] |
| Icon Type | General | SVG / Font | SVG | — | generate_settings[icons] |
Settings can be changed in code with the option_generate_settings filter.
Related
- Colors — text and heading colours
- General & Performance — other General section settings
- Legacy Features › Font Awesome — the old icon font
- Developer reference: Icons and fonts filters, Settings defaults filters