The Container block is the core block behind our plugin. It allows you to create advanced (or simple) containers for your content.
It can be used by itself, but it’s also used inside our Grid Block for each grid item you add.
In most cases, you should start all of your content sections with a Container block. It allows you to set the container width, padding, and margin, which are all super helpful when building a section of content.
Container Links
This is a feature in our pro version only.
It’s easy to turn an entire Container block into one big link.
First, select your Container block, then look for the link icon in the Block Toolbar.
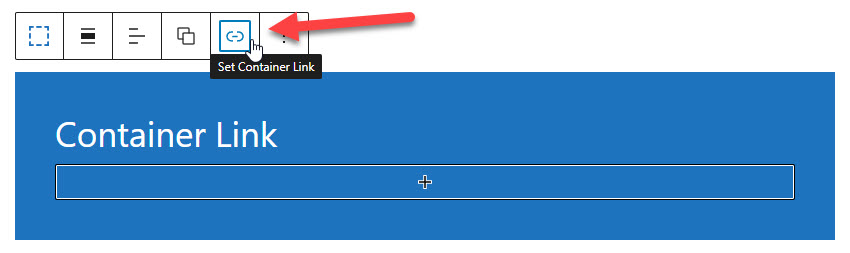
Once you enter a URL for the link, you’ll see more options appear.
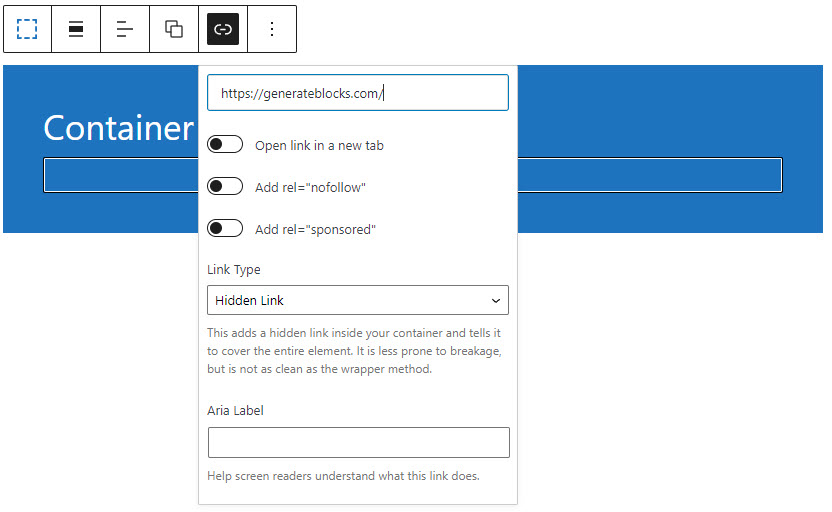
Open link in new tab
This option will add target="_blank" to the link so it opens in a new tab.
Add rel=”nofollow”
If you don’t want search engines to follow the link, you can use this option.
Add rel=”sponsored”
This will add rel="sponsored" to the link.
You can learn more about these attributes here.
Link Type
There are currently two types of link type which add the link to your Container block differently.
Hidden Link
The hidden link option adds an empty <a> attribute inside the container element like this:
<div class="gb-container">
    <a class="gb-container-link href="#"></a>
    <div class="gb-inside-container">
        ...
    </div>
</div>
It sets it to cover the entire element using position: absolute. This method has the advantage of not changing the color of the text inside the container to your link color, and it will work even if you add links inside the container.
Wrapper
The wrapper option changes the HTML tag name of your container to <a> element, like this:
<a class="gb-container" href="#">
    <div class="gb-inside-container">
        ...
    </div>
</a>
This method is semantically correct and has the benefit of not adding an empty element in your markup. However, your HTML will break if you add another link inside the container (like a button, or a text link) as you cannot have an <a> element inside another <a> element.
Aria Label
This option adds an aria-label attribute to the link.
Add Inner Container
When creating top-level sections on your page, it’s sometimes necessary to add an inner Container block inside your main Container block to keep your content contained.
For example, let’s look at a full-width page with a single Container block and content inside of it.
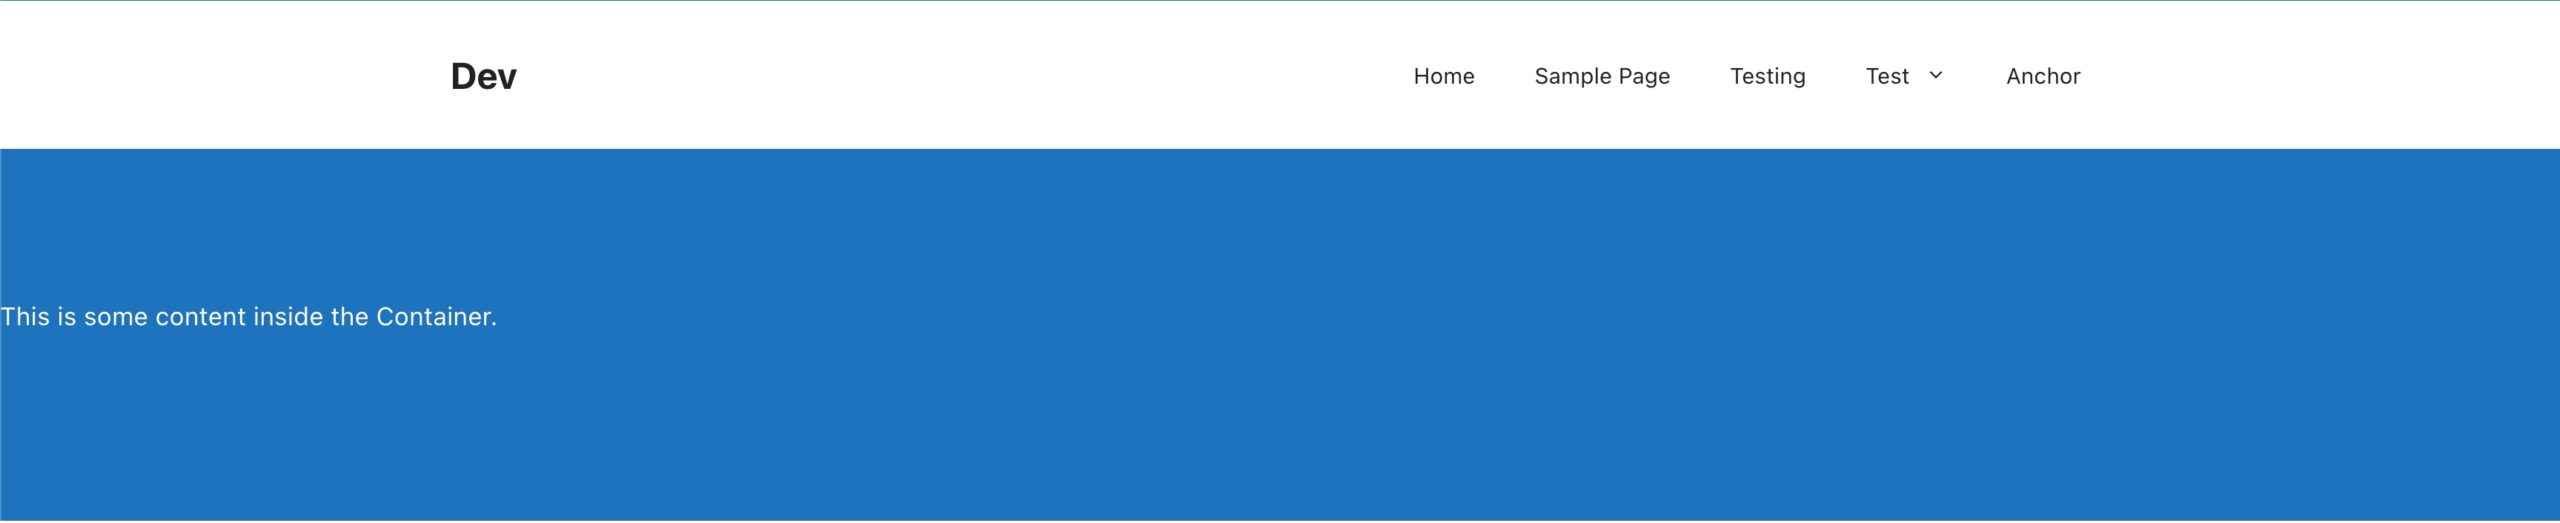
A full-width Container block with content inside of it.
Having a full-width Container block like this is common so you can have a full-width background color or image. However, we usually want to contain our content within it to a certain width.
To do this, you can either manually add a new Container block inside of the full-width Container block, give it a max-width and center it using auto left/right margins.
Alternatively, you can click this button in the Container toolbar that will do all of that for you:

Clicking this button will automatically:
- Insert the inner Container block.
- Select that block for you.
- Set the Max Width of the inner Container block to the Global Width. The max width can be changed in the blocks Sizing panel.
- Horizontally align the inner Container block to the center. This is achieved by setting the blocks Spacing > Margins > Left & Right to “auto”.
Note that this shortcut won’t appear if the Container is already inside another block. In those instances, you can manually add one as you would any other block.
You can see in our second Container block below that our content is now contained.
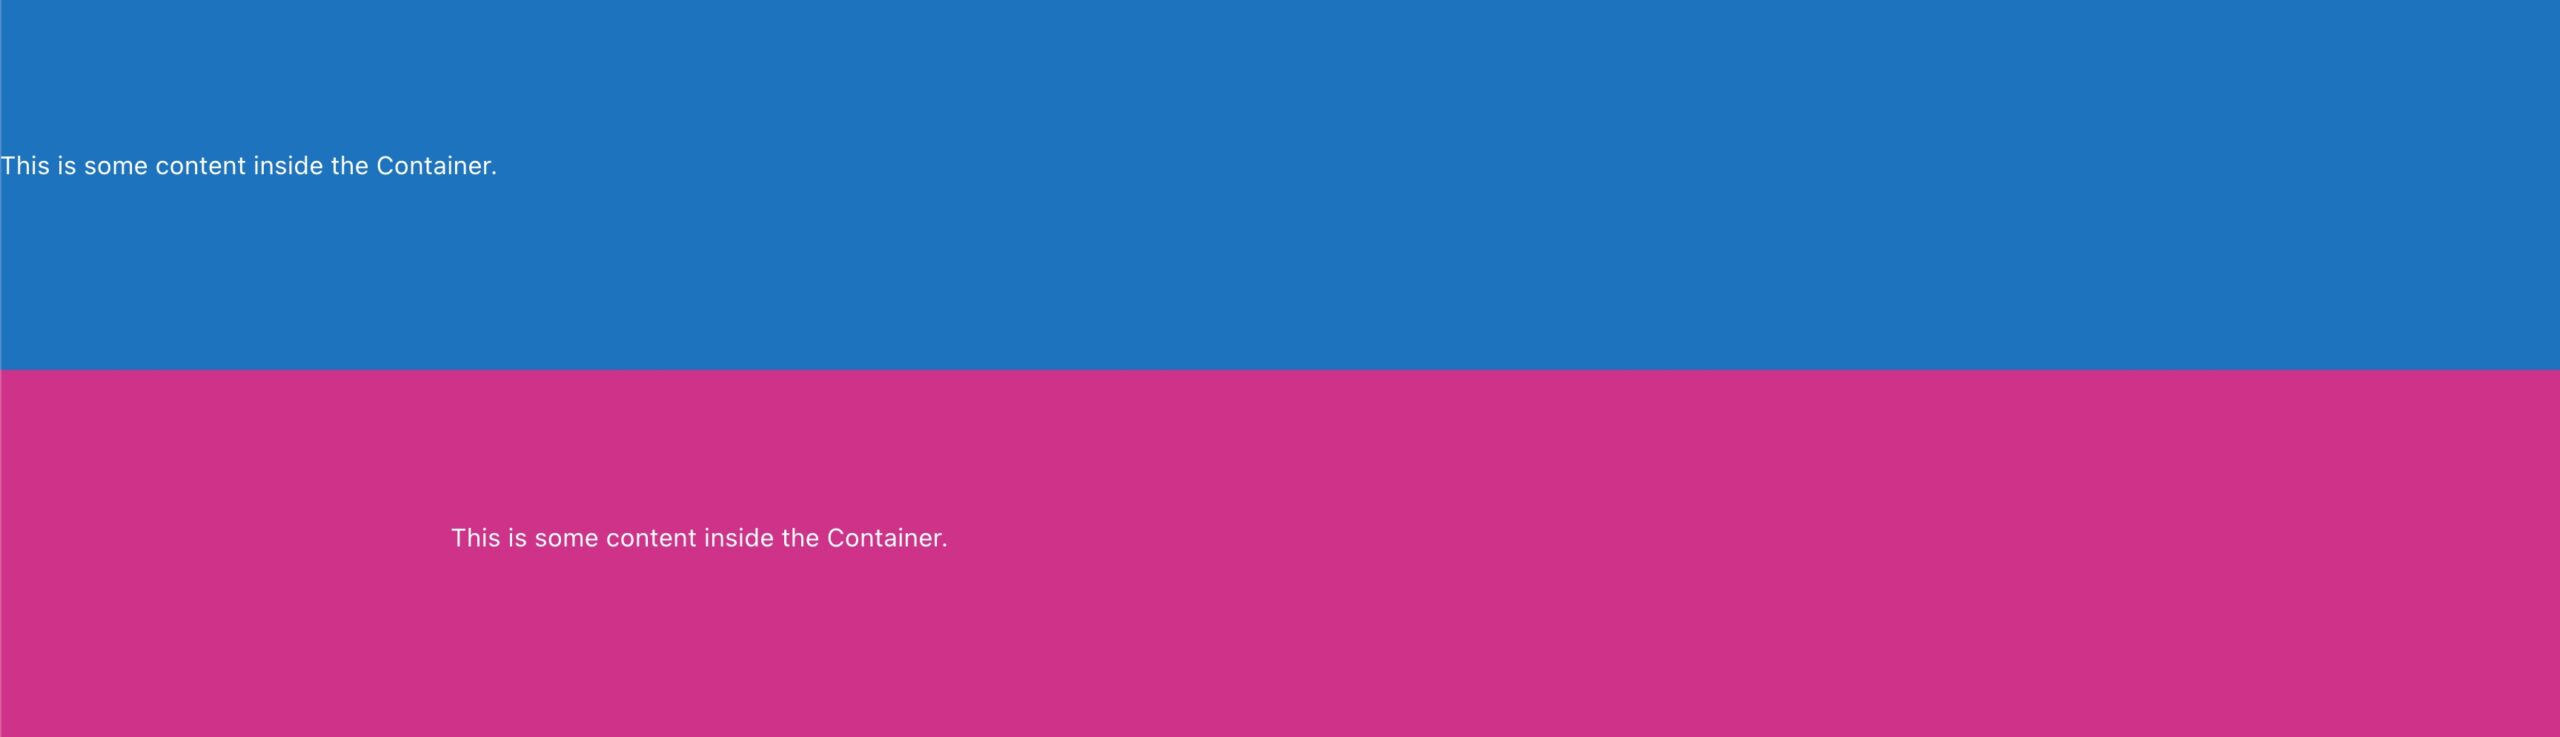
The pink Container has two Container blocks, one for the full-width background and one for the content.
When should I add an inner Container block?
A common design pattern for full-width pages is to split the page into sections. Each section may have a background color or image that stretches the width of the viewport. But the content inside the section never expands beyond a certain width. This is where adding an inside Container block for your content blocks is recommended. But it is purely up to you now, it’s your design and your decision.
What happens if I don’t add another Container inside?
To begin with, nothing bad will happen. It just means if you’re building a full-width page, the content you add inside that container may span the width of the viewport. Which may result in a very wide layout when viewed on large screens.
Migrating Container Legacy Layout
In version 1.7.0 we introduced a new Layout system for all of our blocks.
In order to do this for the Container block, we had to make some changes to the structure of the existing block.
Prior to 1.7.0, the Container block consisted of two separate div elements:
<div class="gb-container">
    <div class="gb-inside-container">
        Your content in here
    </div>
</div>
This inside container was centered automatically, and would default to your global container width set in your settings.
While this was convenient when adding top-level sections to your website, it also added a lot of unnecessary div elements to your website. It also prevented the Container block from using our new Layout system.
Starting in 1.7.0, all newly-added Container blocks only add one div element:
<div class="gb-container">
    Your content in here
</div>
Adding an Inner Container
So now there’s no inner Container by default. How do we add one when we need it?
Check out this article to learn how to add this inner Container. It’s as simple as clicking a single button in the block toolbar.
Migrating Existing Containers
Your existing Container blocks will continue to use the “legacy layout system”. This means they will continue to have that default inner div element, and they won’t have the new layout system available to them.
You can keep these existing Containers block as they are and they will continue to work as they always have.
If you want to migrate them to our new system, we added a built-in way of doing that.
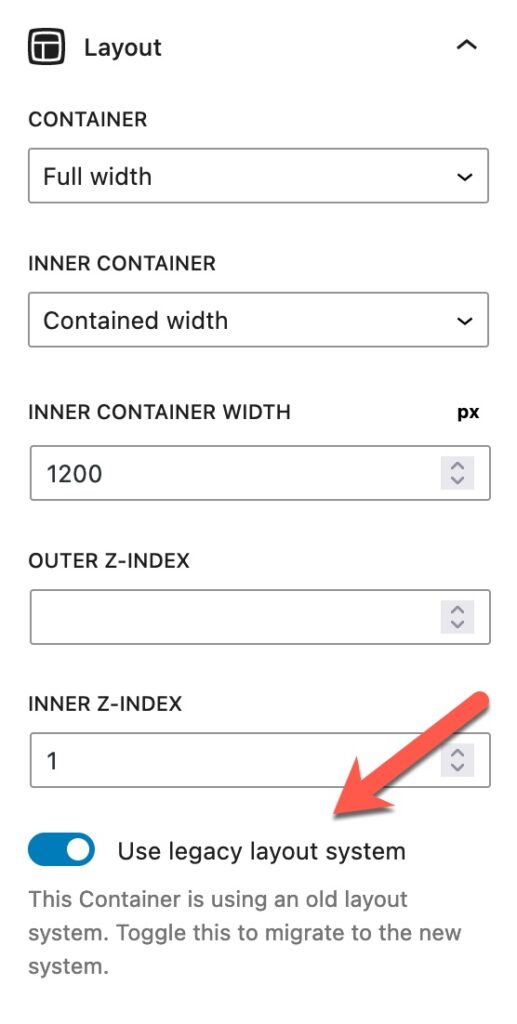
The “Use legacy layout system” toggle
Clicking this toggle will open the following modal:
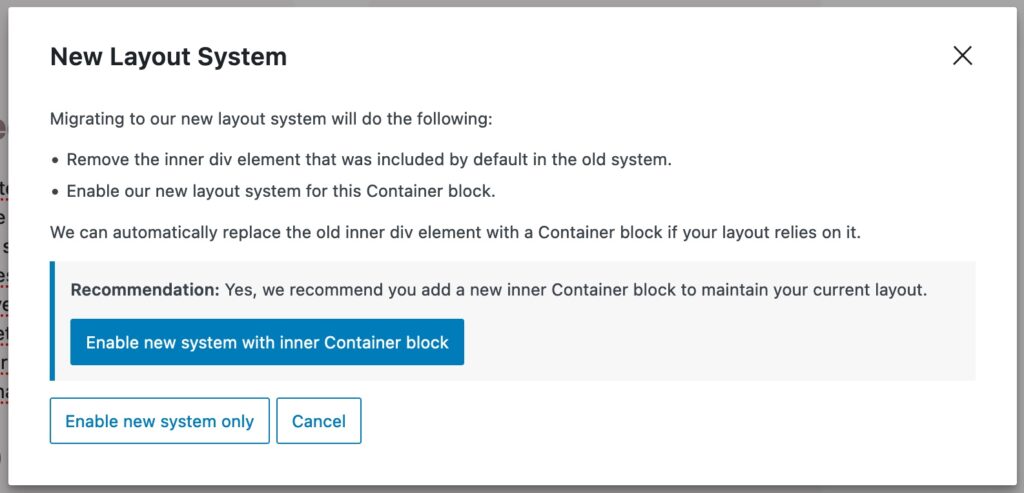
The new layout system migration modal
This modal allows you to do three things:
- Enable new system with inner Container block. This button will create a new inner Container block for you, replacing the old
gb-inside-containerwith a new Container block. This block will inherit settings previously set to that old inside container, like the container width and inner z-index. - Enable new system only. This button will remove the old
gb-inside-containerdiv from the Container block and turn on the new layout system. It will not add a new inner Container block for you. - Cancel. This will close the modal and allow you to make the decision at a later time.
The system will make a recommendation for you based on how you’re using the Container block. While we check for a lot of factors, the decision is ultimately up to you as you may have a particular reason for wanting an inner Container block (or not).
Global Styles
One consideration you have to make here is if you’re using Global Styles.
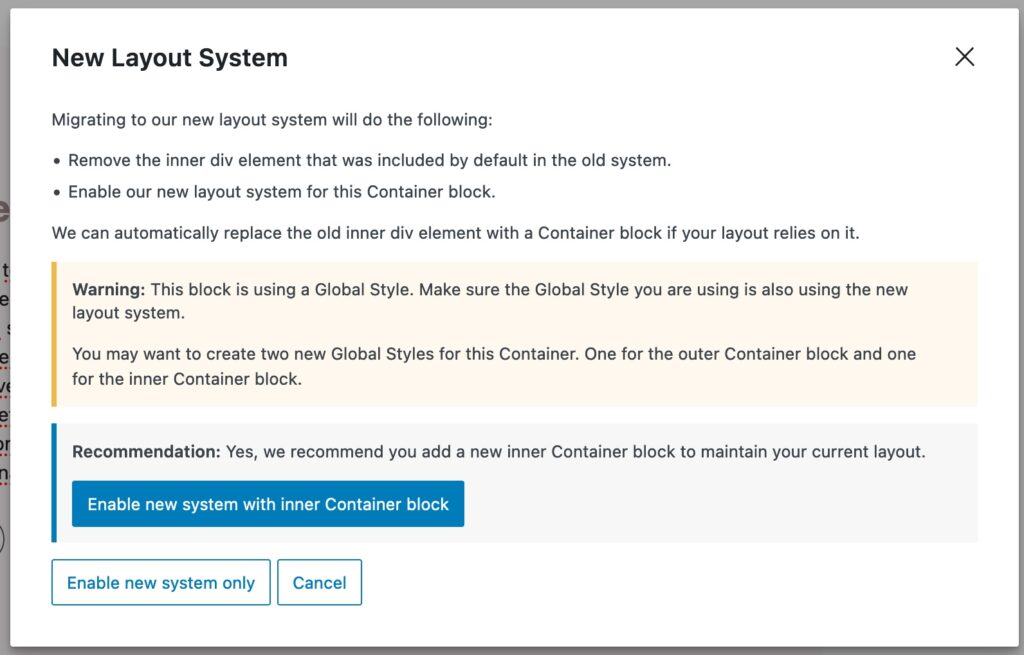
If your Container Global Style is using the legacy system, it means it can be targeting that old gb-inside-container div for certain attributes (container width, inner z-index, padding). If you use that Global Style with a Container block using the new layout system, those attributes won’t apply.
The same goes the other way. If your Container Global Style is using the new system and you add it to a Container using the legacy system, some attributes won’t work as they’re intended.
The solution here is to create a new Global Style for your new Container blocks. You may want to create one Container Global Style for the outer Container, and a separate one for the inner Container.
While it may seem like more work, it’s actually far more customizable. You can now create a single Global Style for all of your inner Containers on your website (with a specific container width, for example).